It's All in the Details - A hat seaming tip tutorial from SICK 'LIL MONKEYS
By: Kelli
Wohlgemuth
Cold weather is here! I usually find myself amidst a flurry of hat orders rather than snowflakes! When
I get these requests the "seams" down the side of the hats always
drive me insane. I like a really smooth
finished product!
AT some
point along your crocheting journey, I am sure you have learned several ways of
seaming hats. This tutorial will discuss
four seaming methods, and give you photos to compare each.
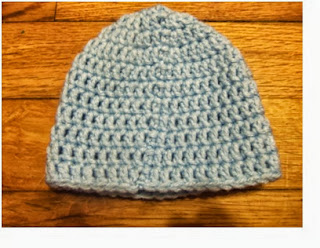
The photo above shows you four newborn hats made with the same number of stitches, the same size hook, and from the same skein of yarn. The bottom two photos are my favorite ways to seam, I think they are the least noticeable. (Updated 3/10/2016: There is a fifth method I learned after writing this post called a "standing DC". My favorite tutorial for that is here by Moogly Blog: http://www.mooglyblog.com/standing-double-crochet-joining/) No one wants their beautiful work detracted from with a bulky or noticeable seam.
1. Using the beginning chain as a stitch:
This
is method that has been around forever.
In this old fashion method you join each round to the top of the
beginning Chain in your round. For
example:
R1:
In a magic circle, Ch 3, 9 dc, pull circle closed, join to the top of the
beginning ch 3 with a SL ST (1o ST)
R2:
Ch 3, dc in same st as ch3, 9 dc inc, join to the top of the beginning ch 3
with sl st (20 ST)
As
you can see this method leaves a noticeable gap between the seam.
2.
Ignoring the beginning chain.
This
is a newer method of seaming. When
seaming like this, you always place your first stitch in the same stitch as
your beginning chain. Then at the end of
the round, you join to the first stitch you made instead of joining to the
chain. So essentially, you are not
counting the chain at all, you use it get "step" you hook up to the
height of your first stitch and then forget it ever existed. Ignore it completely. Do not even use it for your stitch
counts. For example:
R1:
In a magic circle, Ch 3, 10 dc, pull circle closed, join to 1st dc with a sl st
(1o ST)
R2:
Ch 3, 10 dc inc, join to 1st dc with a sl st (20 ST)
This at least eliminates the hole that our first
method created, BUT it also creates a new problem.....a bulky noticeable
seem. So though it looks better than our
first try, let's check out a few more.
3.
Working in the round continuously with no join
This
method is just something I never thought to do until I picked up a free pattern
a little while back. In this method you
leave out the slip stitch and join, and just continuously crochet around, there
for eliminating any seam at all. The
drawback to this method id you must keep with stitch markers, or count every
stitch in each round to keep track of where you are. For example:
R1:
In a magic circle, Ch 3, 10 dc, pull circle closed, use st marker after last st
of each round , join to first dc with a tight dc (10 ST)
R2:
dc in same st as joining dc, dc inc in each st around, (20 ST)
4.
Decreasing the chain, then ignoring it.
This
is very similar to method #2 (Ignoring the chain). The one difference is you will decrease the
regular number of starting chains. So,
for a DC round you would chain 2 rather than chaining 3. . The
reason for lessening the number of beginning chains is that the beginning chain
is used to "step" the hook up to the same height as the first stitch
you will be doing. When you are making a
hat and working in the round, the "slope" of the hat decreases the
height that chain needs to be.
Therefore, when you use a chain 3 for example with a double crochet, you
wind up with a bulky stitch that sticks out awkwardly along the side. A chain 2 with a double crochet will look
much smoother.
I hope
these tips help get you started to flawlessly seamed hats this fall and winter.
Happy Hookin'!
Kelli XOXO
We hope you'll come by and "like" us on facebook!
SICK 'LIL MONKEYS
Get your ergonomic Clay handled Bubble hooks HERE 25% off 3/10 through 3/17 with coupon code: NEWDESIGNS
Get your ergonomic Clay handled Bubble hooks HERE 25% off 3/10 through 3/17 with coupon code: NEWDESIGNS


No comments:
Post a Comment