Monday, July 4, 2022

Low sugar/ Low Carb Cherry Cordial Cream Cheese Mousse

Low Sugar/ Low carb Cherry Cordial Cream Cheese Mousse

I invent with what I have around the house in my cabinets. My hope is that some of you have some of these common items to make quality desserts low in sugar at home  

Recipe:

In 1 bowl combine ingredients below and mix with blender until smooth. Set aside

2 cups heavy cream

1 regular box cream cheese completely softened

3 tsp vanilla extract 


In a 2nd small bowl combine;

8 Tablespoons Hersheys cocoa powder

11 Tablespoons or 33 packets of Splenda (not granulated baking Splenda  

2 pinches of salt

4 tablespoons of full sugar cherry starburst jello. 


Add blended dry ingredients to first bowl. Fold in. Then mix on lowest speed until it begins to thicken. 

Set in fridge overnight. Spoon into desert dishes and top with whipped cream, cocoa powder, a cherry. Top with one all or none to please all the palates in your household. For a more bittersweet cocoa aftertaste definitely dust the mouse it self with cocoa powder before adding whipped cream, or even plain!


Yields 6 - 1/2 cup servings.

10 total carbs. 

   4g natural dairy sugars (from the cream cheese) 

   6g added sugars (from the jello) Dark chocolate cherry cheesecake mouse! Matt and I both really like this one! 


Friday, October 16, 2020

18" Doll Medical Cot Bed

 18” Doll Medical Cot Bed

Supplies:

-6 are spray paint can lids. Preferably spray paint can lids. Home Depot and Lowe’s will be them for free if you ask and plan ahead.  You could also use any similar sized can lid destined for the trash, as long as you have 6 

-Lots of bernat Blanket. Depending on color choices it changes what’s needed. If you made the whole bed one color you’d need 1.5 large balls

-plastic yarn needle (I never actually used one, I used a smaller hook and pulled the ends inside)

-scissors (I also never used these, I break my blanket yarn about 12" from where I want it to end.)

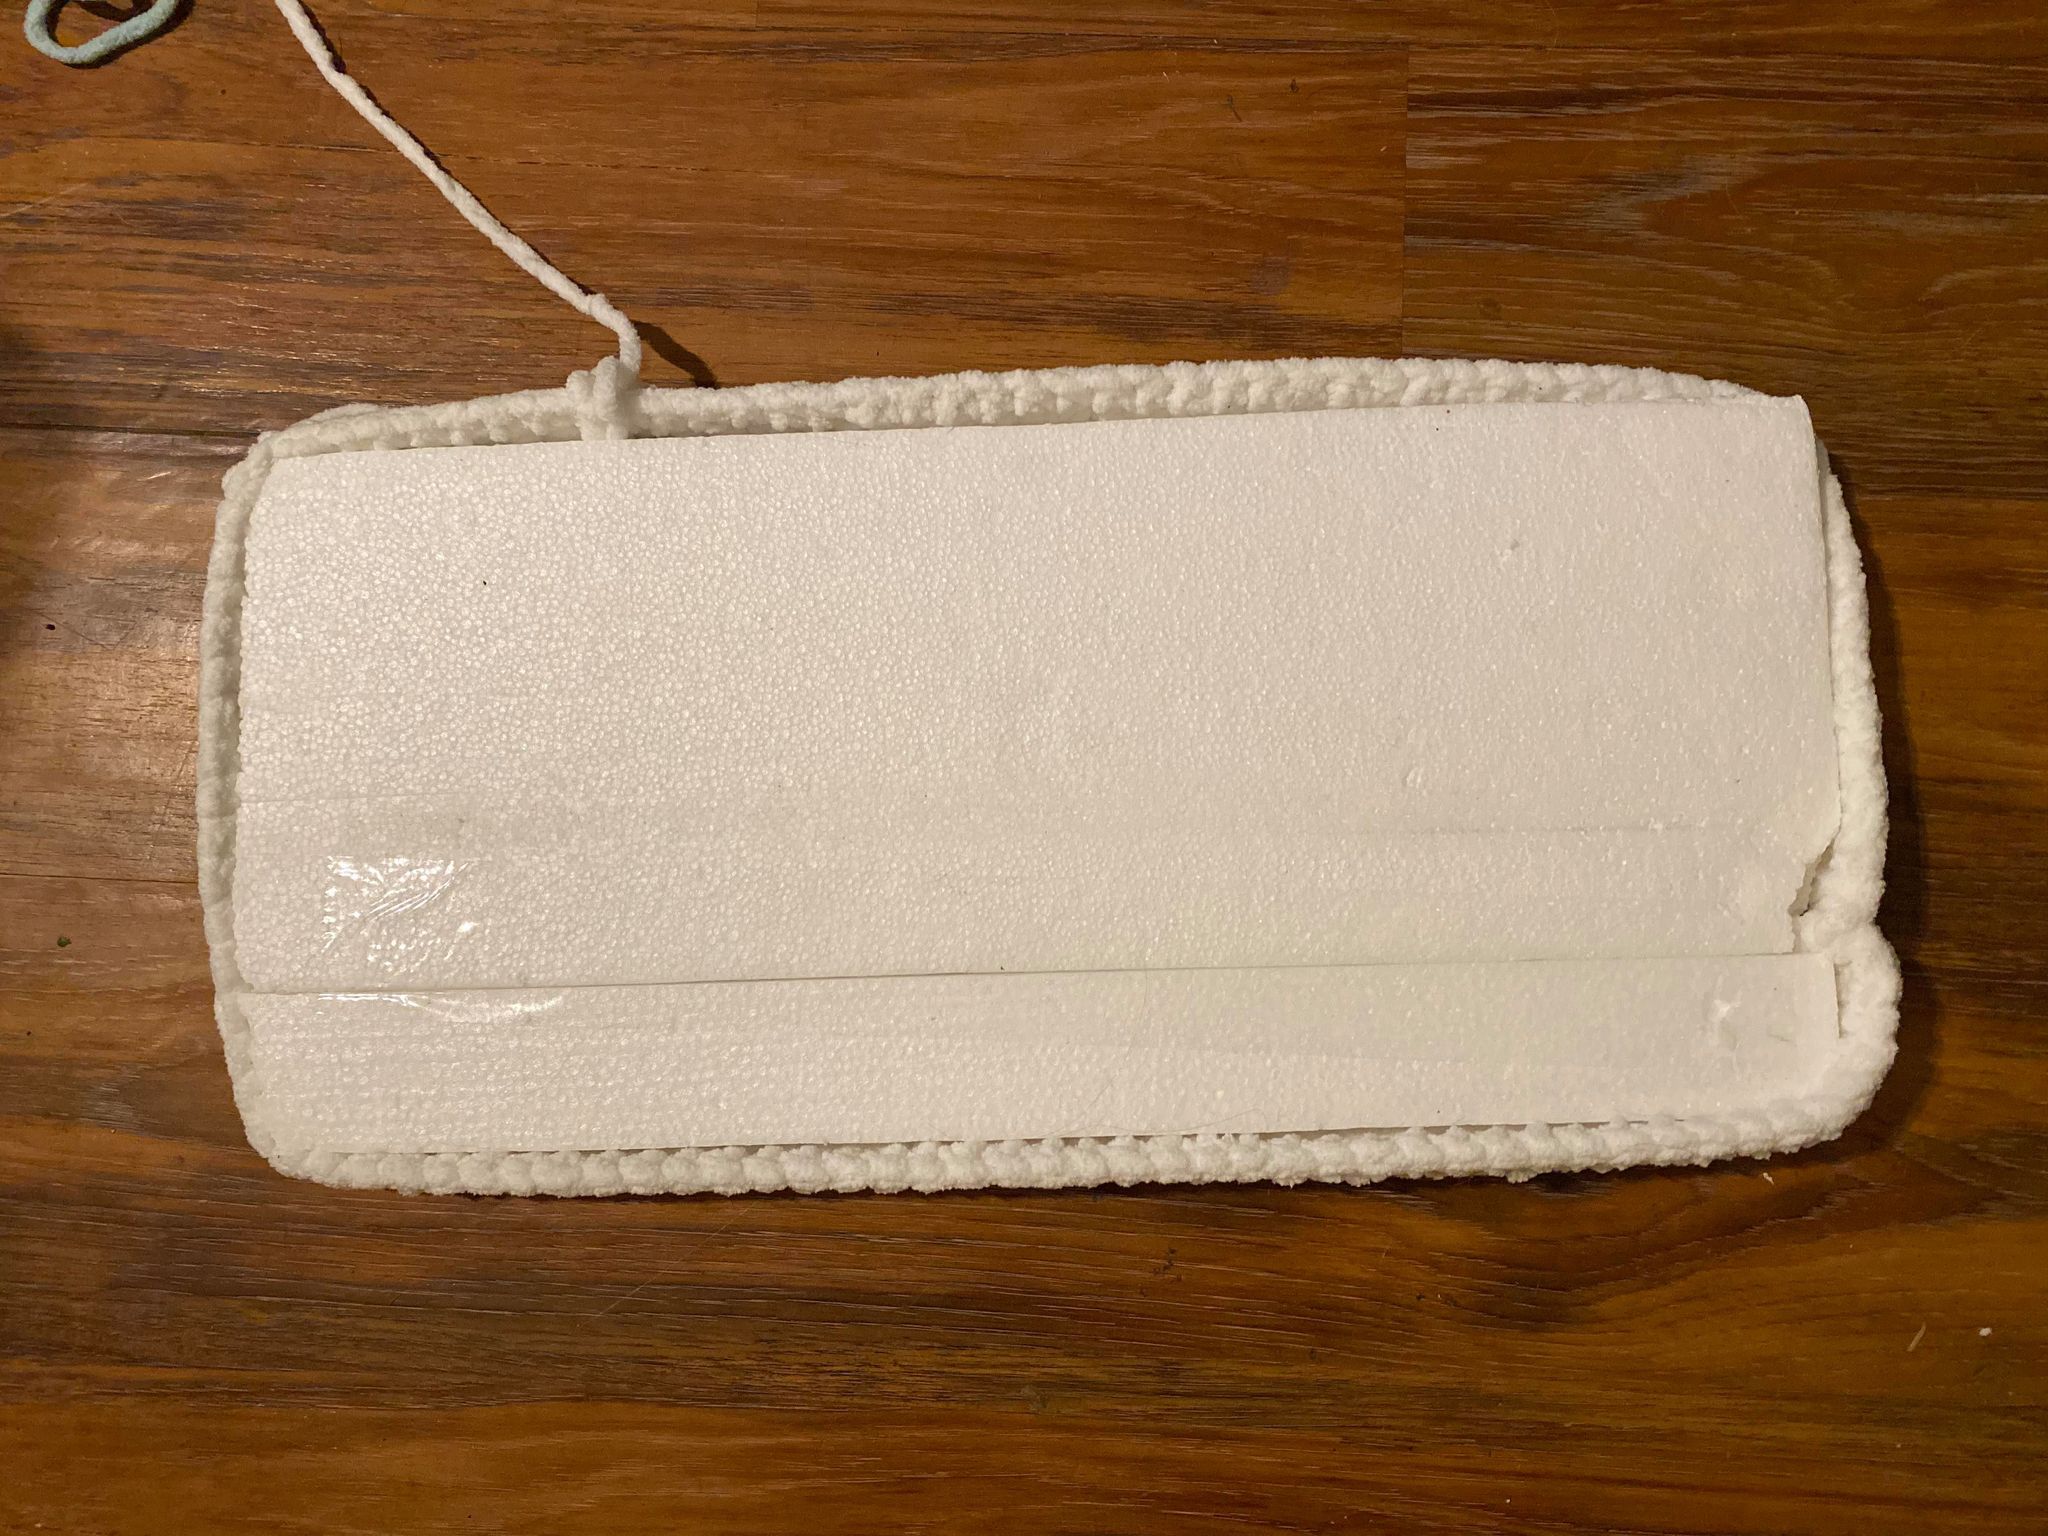
-8.5” x 18.5 x 1” or 1.5” foam. I used styrofoam to keep it out of a land fill. But any square edged foam will do. Floral foam.  Memory foam. Maybe even polyfill, but you might line it with corrugated card board or cut out a piece from a plastic lid to strengthen the cot.

1 Size K/6.5mm Sick Lil Monkeys Bubble Hook & 1 Size L/8.0mm Sick Lil Monkeys Bubble Hook (any 8mm hook will work, but obviously we are partial to ours!)


Abbreviations:

sl st - slip stitch

st - stitch

sc - single crochet

hdc - half double crochet


Top & bottom of bed

Make two:

With same color as sides and L/8.0mm hook:

R1: ch 41, work 1sc, in the back hump (not the front braid), in the 2nd chain from hook work and 1 sc into each hump on the back of the chain. Be careful not to twist your chain.  (40 st)

R2 - R18: Ch 1, turn, 1 sc in each st across (40 st)

Do not finish off. Ch 1, turn, place in sc in the BLO only of the next 40 st (this will create a “line” on the side of the top of the mattress), as you turn the corner, work 3 sc in the end of the first row, then work 1 sc at the end of the next 16 rows, then work 3 sc in the end of the last row, (20 sc) turn the corner and place 1 sc in the BLO only for 40 st (this will place a line down the other side of the mattress), as you turn the final corner, work 3 sc in the end of the first row, then work 1 sc at the end of the next 16 rows, then work 3 sc in the end of the last row (20 sc), Join to 1st sc of edging round. Do not finish off the 2nd one you make. Finish off the 1st one you make. (124 st)

Doll bed sides

With size K/6.5mm hook

R1: Ch 3, sc in 2nd sc from hook (2 st)

R2-R93: ch 1, turn, *(2sc in 1st, 1sc in next st) (124 st)

Join two short ends with sl st or whip stitch. 


Once you have joined the long strip into a circle by sl st, turn and add an sc border all the way around, use the side of each row ch 1, *(2sc in 1st, 1sc in next st), repeat from * until you’re back to the start and join to 1st st with a sl st. (124 st) finish off. 

Turn it over and join again.  Repeat the same edging process to the other side of the doll bed side piece. 

Once you have bordered all 4 sides on the top and bottom with a sc border check to be sure it fits your foam.  Then use safety pin or stitch marker to hold your corners together.


Then crochet the top to the sides with one row around of (124 sc) join ends with sl st, Finish off. 


Legs - Make 6

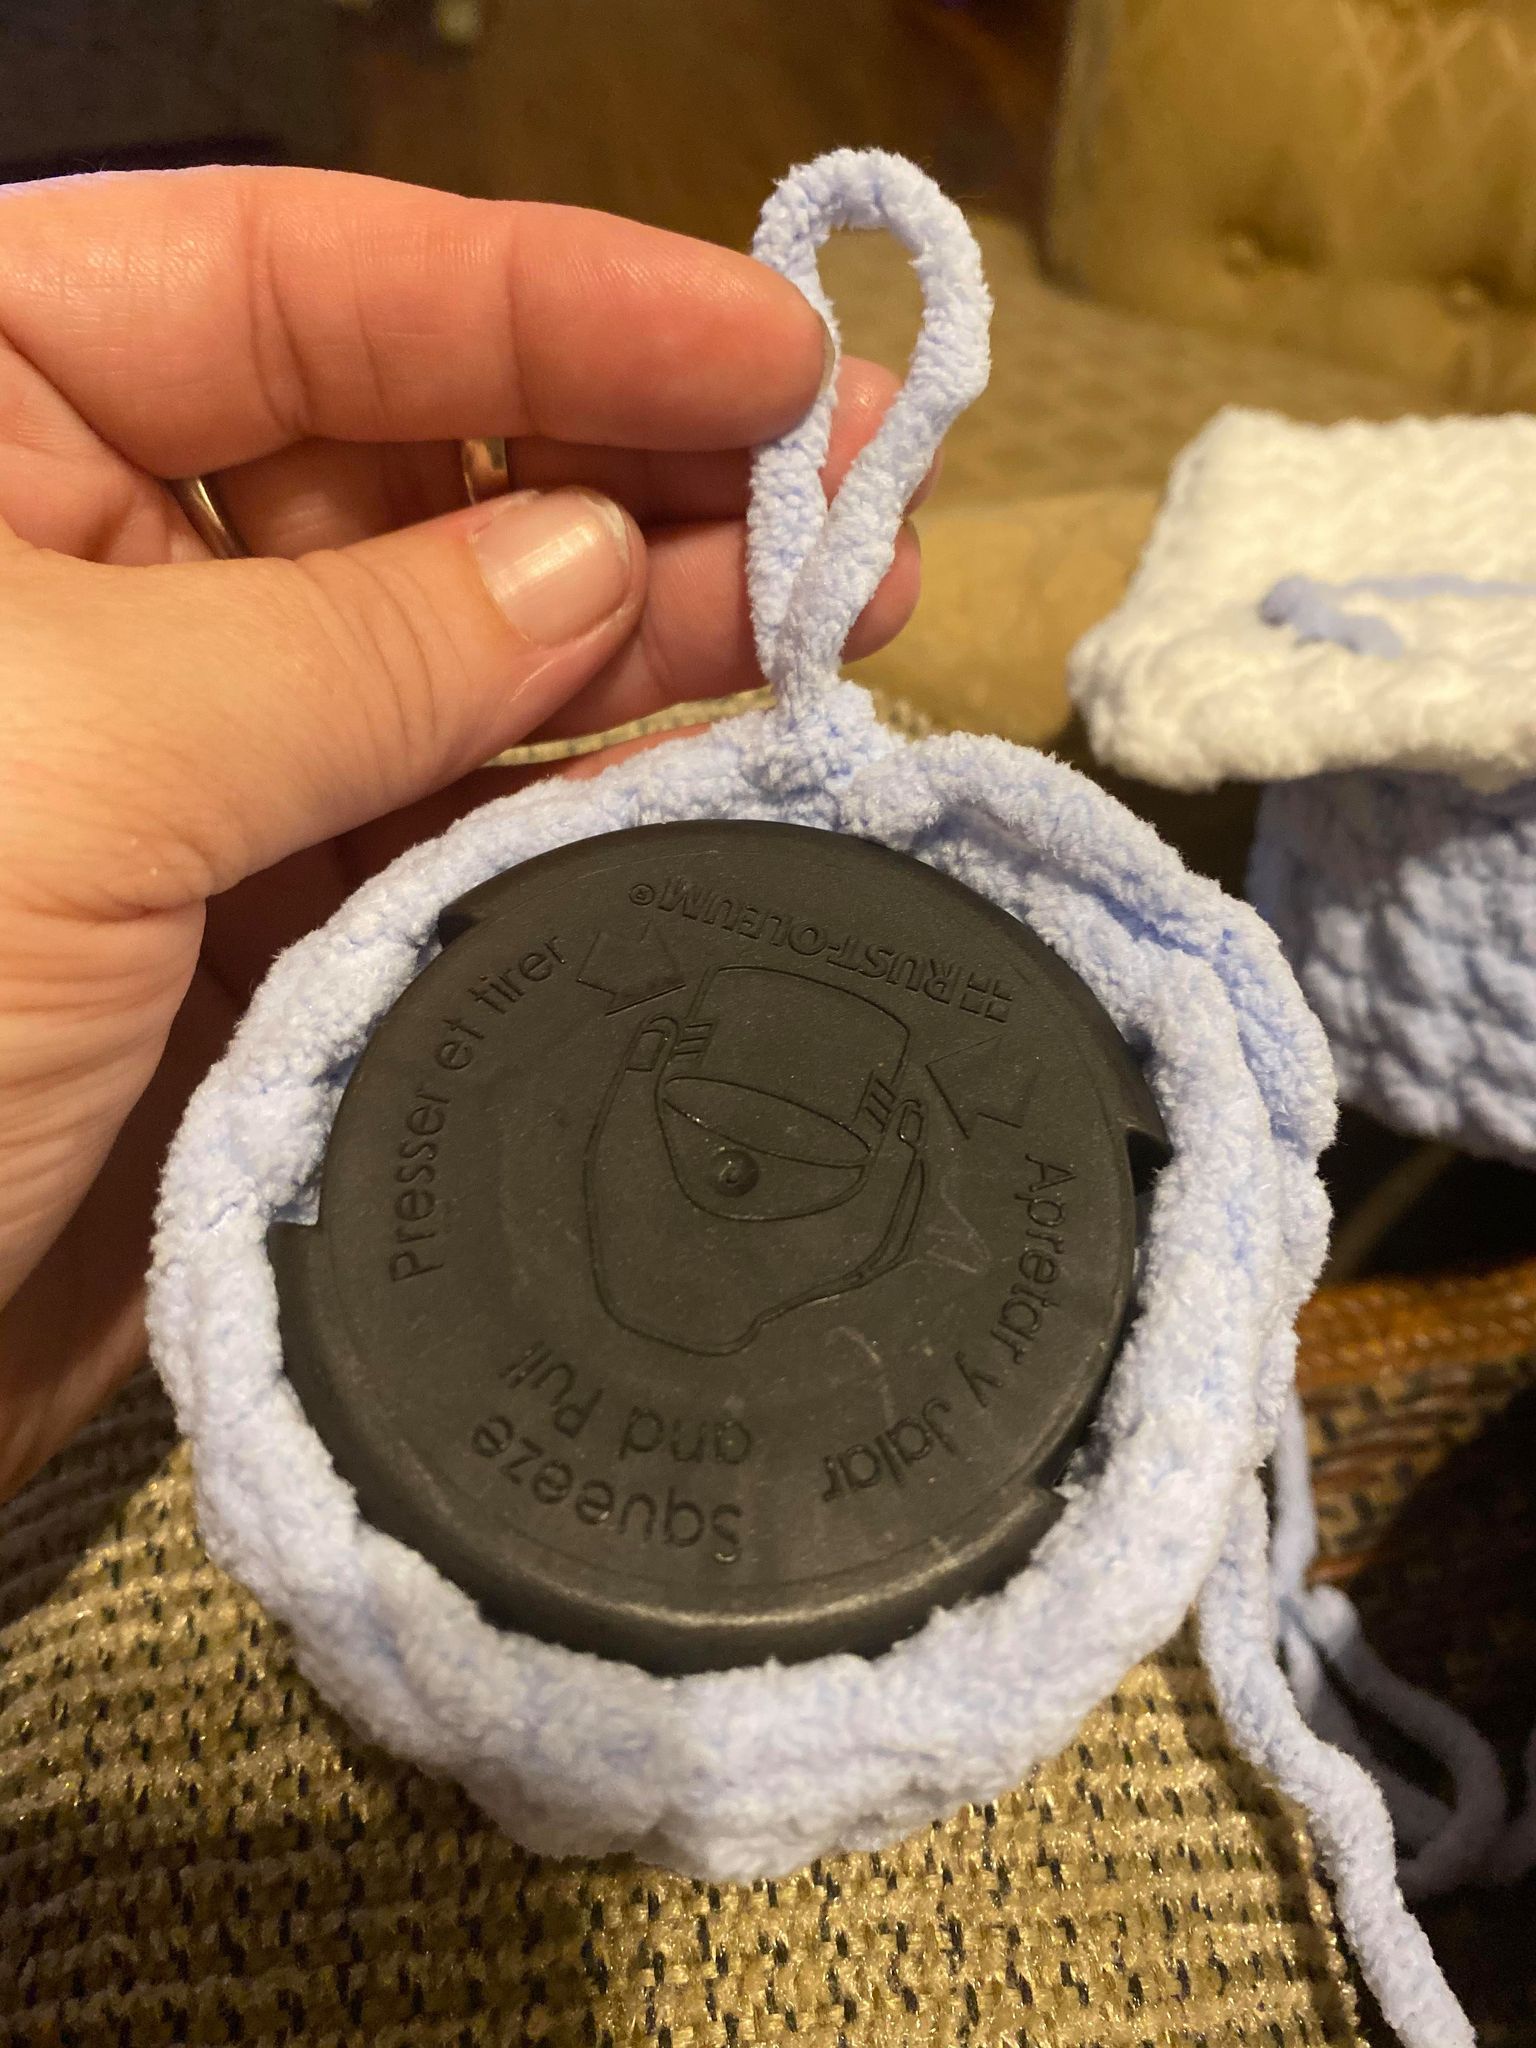
I looked around for items I could repurpose as “legs” or “feet”. We are remodeling so I settled on spray paint can lids destined for the trash.  Hair spray lids, Pam cooking spray, etc. we’re just looking for something to give the feet a bit of strength. 

(If you absolutely cannot find plastic caps designed for the trash, tightly packed poly fill should also work. We just think this looks cooler)

Before beginning, take the piece you finished off, and a black sharpie. Remember the BLO row in the top and bottom of the bed?  That is to keep you from placing the feet out too far to stitch the sides together later. Place the feet evenly just inside the BLO row and the edging rows and trace a circle. We will use this later to guide our attachments and it will not be seen once our bed is finished. 


The feet:

You will make 6, but make one at a time because you don’t finish off at the end of each foot.

Using a blanket yarn in the color of your choice and a size L/8.0mm hook. 

Start with a magic circle 

R1: form a magic circle. Ch1, hdc 6 times. Join to the 1st hdc with a sl st.  (6 ST)

R2: ch1, place 2 hdc in each st around. Join to the 1st st of R2 with a sl st (12 ST)

R3: ch1, *(place 2 hdc in the 1st st st, place 1 hdc in the next st), repeat from * around. Join to the 1st st of R3 with a sl st (18 ST)

You will continue increasing rounds until the piece is slightly larger than the base of the cap you are using. 

R4: ch1, sc in BLO in each st around, join to 1st st with a sl st (18 st)

R5-R9: ch1, sc through both loops in each st around, join to first st of round with a sl st. Do not finish off. 

Work the cap down into the foot cover you just made. The flat part of the cap should be looking up at you. 


Pull the last loop you didn’t finish off on the foot, pull it through the bottom piece somewhere on that black line. Sl st around evenly until you’ve joined all 18 st. Finish off.  Push the bottom of the foot in towards the empty part of the cap, creating a small dome in each foot. Do this to all 6 feet.                                      


Now it’s time to attach the bottom. With your foam inside the top with the sides joined and laid foam facing up, top yarn facing down. Line up your bottom. I count my stitches and use hooks or pins to join the 4 corners to keep myself on track. 
Pick any place and join the corner of the sides and bottom and attach white bernat with an L/8.0mm hook.
 
Ch1, starting in same st, *(2 hdc in same st and 1 hdc in the next st), repeat from * all the way around. Join to 1st st with a sl st, finish off
 

Now you're finished and the toys have a nice repurposed green clean area to get better at the Toy Hospital!


Friday, October 2, 2020

No Sew 18" Doll Pillow


What to do when your grand's doll looses her pillow? Here’s a quick 15 min project to rectify that! Introducing the:
No Sew 18” Doll pillow
Supplies: 3 oz Bernat Blanket yarn Poly fill or yarn scraps for stuffing Size L/8.0mm Sick Lil Monkeys Bubble Hook


(Need an 8.0mm? Just contact us!)
Gauge: 8 sc by 8 rows = 4”x4”
Row 1: Ch 15, turn and work 1 sc in the back hump of each chain starting in the 2nd Ch from the hook. (14 sc)
Rows 2 - 10: Ch 1, turn, sc in each st across (14 sc) Do not finish off. Fold in half. Ch 1.

First Border Row: Join corners by sl st together, Ch 1, place 3 sc in the first st join, then join the sides of each of the next 5sc together, place 3 sc in the final st (13 sc). Do not finish off.
Turn corner and place 1 SC around the space in between each st around the place a natural join would be. you can easily see this by flattening your piece. You will be sticking your hook though the piece, to find a hole that is an even secure place to make your sc's all the way across (14 sc), turn corner Place 3 sc in the first st, and place 1 sc in the next 5 st, place 3 SC in the last st (13sc), turn corner, stop and stuff pillow with fiber fill or yarn scraps, place 1sc in through the end rows on both layers to close final side with an sc (14 sc)

Second Border Row: Join to 1st st of 1st Border row with sl st, Ch 2, work 3 dc in this st and across the next 12 st, turn corner and join to 1st sc, with sc. sc 13 more across until you reach the next corner and turn, place 3 dc in each of the 13 st down that side, turn the next corner, and join with a sc, sc down the row until you reach your 1st Ch 2, join to 1st Ch 2 and finish off securely. pull small tail inside pillow with hook! Scissor free, sew free pillow in 15 minutes!
 

Thursday, September 27, 2018

My First Instapot Experience: Dairy Free & Gluten Free Bourbon Street Chicken & Cauliflower rice

My First Instapot Experience: 
Dairy Free & Gluten Free Bourbon Street Chicken & Cauliflower rice
My First Instapot Experience: Dairy Free Gluten Free Bourbon Street Chicken and Cauliflower rice

I borrowed the InstaPot 6 in 1 Lux mini from one of my mom’s ; so that we could test this expensive appliance out before we invest in one. Here is my chronicle of our First Experience.

We have dietary restrictions in our home and eat as clean as we can.

The first thing I was excited to try was Cauliflower rice. But to my disappointment, I couldn’t find anything that literally told me step by step what to do. I had no working knowledge of a pressure cooker, and knew this could become mush if not done correctly. I’m recording my exact steps so that I can repeat this meal later for us. It was a dairy free, gluten free hit!

Instapot Cauliflower rice:
Large head of cauliflower.
1 - 12oz can of low sodium non GMO chicken broth
      (Divided into 1 cup and what’s left over)
2 Tbsp Veg oil
Garlic Powder
Onion Powder
1/8 tsp Black Pepper
1/8 tsp salt

1.  Remove the leaves and cut raw cauliflower into large hunks.
2.  Pour 1 cup of chicken broth into metal inner pot.
3.  Add cauliflower hunks.
4.  Add lid, turn, and lock into place.
5.  Set the vent to the center seal position.
6.  Press the pressure cook button and set to 1 minute.
7.  After a few seconds, the pot will say “ON”.
8.  After about 9-11 minutes, the pot will have built pressure and begin counting down from 1 minute.
9.  Once pot finishes,stir around and be sure it is thoroughly cooked, but not mushy, or having large chunks
10.  Use potholder glove to move pressure release from sealed to low pressure vent on the right.
11.  Let 3 minutes elapse. Once the pressure is safely vented; open the lid.
12.  Remove from heat.
13.  Transfer cauliflower to strainer.
14.  I didn’t have a potato masher, so I used an egg beater to mash it into rice like pellets.
15.  Set instapot to Sauté, add two tbsp veg oil
16.  Add 4-5 shakes of garlic powder.
17.  Add 4-5 shakes of onion powder.
18.  Add 1/8 tsp of black pepper and 1/8 tsp of salt.
19. Add 4 Tbsp of chicken broth.
20. Sauté for 2 minutes.
21.  Then add cauliflower and sauté 2-3 minutes.
22.  Remove inner basket (don’t forget potholder gloves!), and set to the side for later.

Dairy free Gluten free Bourbon Street Chicken:
2.5 lbs boneless skinless chicken thighs
1/2 cup organic soy sauce
1/2 cup fresh diced yellow onions
1 cup organic 100% pure honey
1/4 cup organic ketchup (I use up the condiment packets in the fridge, because I’m cheap.)
1/8 tsp salt
1/8 tsp black Pepper
2 Tbsp Yellow corn meal (NOT corneal mix)
1 Tbsp water

1. Combine first 7 ingredients in Instapot.
2.  Close and lock lid.
3.  Set vent to center sealed position.
4.  Press pressure cook button and set to 20 minutes.
5.  Instapot will display the word “ON”, as it builds pressure.
6.  Once pressure builds display will begin counting down from 20.
7.  When 20min expires, use potholders to set vent to right side & low pressure release for 5 minutes.
8.  Move vent to far left to quick release the end of the pressure.
9.  Use tongs to remove and chicken.  Dice Chicken.
10.  Add yellow cornmeal and water together and mix in small bowls.
11.  Set Instapot to Sauté
12.  Add diced chicken and corneal mix.
13.  Cook 4-5 minutes as sauce thickens.
14.  Remove from Heat.
15.  Transfer to serving dish.
16.  Add diced cauliflower back to inner bowl.
17.  Sauté for 2-3 minutes with splash of left over chicken broth.
18.  Remove from heat.
19. Transfer to serving dish.
20. Serve as much cauliflower rice as desired and spoon chicken over it.
21. Enjoy!


Saturday, October 22, 2016

My repurposed "Easy Peasy 18" doll panties"


As many of you already know, we sell around 3,000 hooks a year at SICK LIL MONKEYS! 

To order just visit here: our SICK LIL MONKEYS Facebook Page

Thursday, September 29, 2016

WIDE Color Pooling


Not long ago, like most of you, I began to see "color pooling" popping up everywhere in our crochet world.  I was very drawn to it,  especially since I have never really appreciated variegated before. Now I saw a way to really enjoy some of my favorite variegated colorways!  So, last week I gave it a shot, and it was neat but I had this fairly narrow piece of fabric, and the first method I read about, i.e. chaining 20 or 24, certainly isn't fool proof, I finished not really understanding HOW I successfully color pooled, and with a piece of rectangle crocheted cloth that was not good for very much.   

Meanwhile, also like most of you, I was reading lots about all of these amazing super scarves! I had a super cool idea  for one I Wanted to make myself , but I needed a wider section of color pooling.....Hmmmmmm.....     

Then two days ago, I came across the article that made my "light bulb click".  I REALLY HOPE YOU will checkout this explanation of color pooling by Ann Mancini-Williams, over at the Glamour4You Blog.  The article is appropriately titled, "Planned Pooling With Crochet Made Easy - 4 Simple Steps".  Once I finished her article I felt certain I knew how to go WIDE.  

Go read her tutorial, and then try working TWO full color repeats for the first row.  In the photos above I added one stitch past my color repeats, but I think my next attempt I will try adding 1 stitch for EACH color repeat. I may even try a full afghan size.  Have YOU TRIED WIDE COLOR POOLING?  PLEASE COMMENT AND  LET US KNOW below! 

Tuesday, September 20, 2016

What IS a Mudd Bubble Hook anyway?


As we grow, we have many fans that have been with us since we began in 2012, and we are happy to welcome many new fans. We understand our hooks are an investment, so please feel free to message us any questions you have!  The caning takes hours to weeks, or must be bought from another clay artist, the sculpting itself takes even more, then they are put through 13 grades of hand sanding, a mineral oil treatment, and cheese cloth buffing to achieve a truly silky smooth feeling on what we feel is the BEST hook you will ever use.  Please note they may be slightly eggshell finish but are not intended to be reflective.  We take our customers feedback SERIOUSLY.  Over the seven years we have even edited and streamlined the sculpt based on YOUR combined feedback.  We are proud to say we have a very successful hook line, but unlike some hook makers with a team of over 20 artisans, I am but one person and an apprentice.  My hands are beginning to argue and dictate how much I can work the clay each day.  Our apprentice is gearing up to take over in the future.

I still had 4 Etsy orders for a total of 14 hooks to finish when I began the sale. As I worked them I decided to start practicing canes, I mean they are mudd hooks anyway, right?  And I think we have found the best solution for both me AND you!  The last 6 mudd hook styles I have made came from one of three places:
1)Practice canes
2) Older canes that needed to be mudded because they were too difficult to work
3) The ends of new canes I have reduced
What this is doing is causing each hook to be more of a surprise design rather than just swirling into muddy colors.  I will continue to work mudds in this fashion, depending on what is on my table or coming off my pasta roller you could get ANY design from an ombre, to a mudd cane, or cane ends.  Here is a photo of the last 6 styles before sanding:

I'm going to keep mudd prices where I have them for now in a matte finish.  Matte finish has only have one grade of sanding and will feel slightly grittier than their 13 grade buffed counterparts, the sale prices will stand.  And those are:
Any size that I have on hand in Bates, Boye, or Amour in Matte finish:
Bates - $27
Boye $25
Amour  - $40
Any size that I have on hand in Bates, Boye, or Amour in silk finish:
Bates - $42
Boye $40
Amour  - $55
To order a specific size not in overstock or on hand in matte finish:
Bates $37
Boye $35
Amour $50
To order a specific size not in overstock or on hand in silk finish:
Bates $52
Boye $50
Amour $65
To order any specific cane design, it will be full price as the canes will be limited and make 10 - 15 hooks each. Also just for the ease of processing I am no longer keeping canes and multiple listings for years on end, we will have them and make hooks with them until; they are gone.  If you want to be one of the 10 - 15 we that we make you'll need to order that specific design at full price in Matte finish:
Any size Boye - $45
Any size Bates - $47
Any size Amour - $57
To order any specific cane design, it will be full price as the canes will be limited and make 10 - 15 hooks each. Also just for the ease of processing I am no longer keeping canes and multiple listings for years on end, we will have them and make hooks with them until; they are gone.  If you want to be one of the 10 - 15 we that we make you'll need to order that specific design at full price in Silk finish:
Any size Boye - $60
Any size Bates - $62
Any size Amour - $72